Evaluator Fine-tuning
Build your own evaluation metric by fine-tuning alBERTa evaluator models

The AutoEval fine-tuning service enables you to develop models that represent your custom evaluation criteria. The flow is roughly as follows:
- Start with a Dataset of your application data.
- (Assuming you don't have labels) Specify your evaluation criteria and generate labels with synthetic labeling.
- Use the AutoEval fine-tuning service to train a fine-tuned evaluator model using the labeled data to learn the evaluation criteria.
The fine-tuned model will then produce a numeric 0->1 probability score for every request.
Some example evaluators that AutoEval customers have trained:
- A custom response quality metric that includes succinctness, clarity, and accuracy.
- A custom correctness metric for tool use (function calling) in a multi-agent system.
- A custom brand tone metric to measure LLM response adherence to company's brand tone rubric.
Why fine-tune?
Fine-tuning your own alBERTa evaluator model is much more effective than LLM Judge style eval approaches for a number of reasons. Unlike an LLM Judge, this model can be small, fast and include human-in-the-loop refinement:
- better metric quality -- the quality of evaluations is bound by quality of the labels (which can be refined with human feedback), not bound by an LLM's ability to understand your application context.
- small & fast -- 100x faster than LLM Judge (can run inference in 10-300ms), which allows these evaluators to run online as guardrails.
- customizable -- the model is simply learning the label distribution, making it easy to teach it any kind of classification task.
You can fine-tune as many evaluators as you want – one for each evaluation criteria you need for your application.
Usage Guide
Upload Datasets
Create a Dataset containing the application trace data to use for fine-tuning.
We recommend at least a few hundred examples (256 minimum). A few thousand examples is ideal.
During the fine-tuning flow you can choose which of these columns to include in the training. Make sure that the data contains at least one of the following columns:
inputoutputground_truth
Don't have app data handy? No problem - check out our Example Datasets to get synthetic datasets to try out the platform.
Label data
Use synthetic labeling flow to define your evaluation criteria and generate labels.
Training and test data split (optional)
Split the dataset into a training dataset and a test (holdout) dataset.
We recommend an 80/20 or 90/10 split.
You can do this via API:
- python
from lastmile.lib.auto_eval import AutoEval, Metric
from sklearn.model_selection import train_test_split
import pandas as pd

client = AutoEval(api_token="api_token_if_LASTMILE_API_TOKEN_not_set")
dataset_df = client.download_dataset(dataset_id=dataset_id) # Labeled dataset from previous step

# Split the data into training and test sets
train_df, test_df = train_test_split(df, test_size=0.2, random_state=42)

train_df.to_csv('train.csv', index=False)
test_df.to_csv('test.csv', index=False)

test_dataset_id = client.upload_dataset(
  file_path="test.csv",  # Your test dataset file
  name="My Test Dataset for Fine-tuning",
  description="Test dataset for evaluating the fine-tuned model"
)

train_dataset_id = client.upload_dataset(
  file_path="train.csv",
  name="My Training Dataset for Fine-tuning",
  description="Training dataset for the fine-tuned model"
)
Fine-tune model
At this point we have labeled application data to train, and test the model. Time to fine-tune!
API
- python
- node.js
# Continuation from previous step
fine_tune_job_id = client.fine_tune_model(
  train_dataset_id=train_dataset_id,
  test_dataset_id=test_dataset_id,
  model_name="My Custom Evaluation Metric",
  selected_columns=["input", "output", "ground_truth"], # You can decide which of these columns to include in the training data
  wait_for_completion=False # Set to true for blocking
)

print(f"Fine-tuning job initiated with ID: {fine_tune_job_id}. Waiting for completion...")
client.wait_for_fine_tune_job(fine_tune_job_id)
print(f"Fine-tuning job completed with ID: {fine_tune_job_id}")
import { AutoEval } from "lastmile/lib/auto_eval";
const client = new AutoEval({
  apiKey: "api_token_if_LASTMILE_API_TOKEN_not_set",
});
const modelName = "My Custom Evaluation Metric";
const fineTuningJobId = await client.fineTuneModel({
  trainDatasetId: datasetId,
  modelName,
  selectedColumns: ["input", "output", "ground_truth"],
  waitForCompletion: false, // Set to  true to block until completion
});

console.log(`Fine-tuning job initiated with ID: ${fineTuningJobId}. Waiting for completion...`);
await client.waitForFineTuneJob(fineTuningJobId);
console.log(`Fine-tuning job completed with ID: ${fineTuningJobId}`);
UI
-
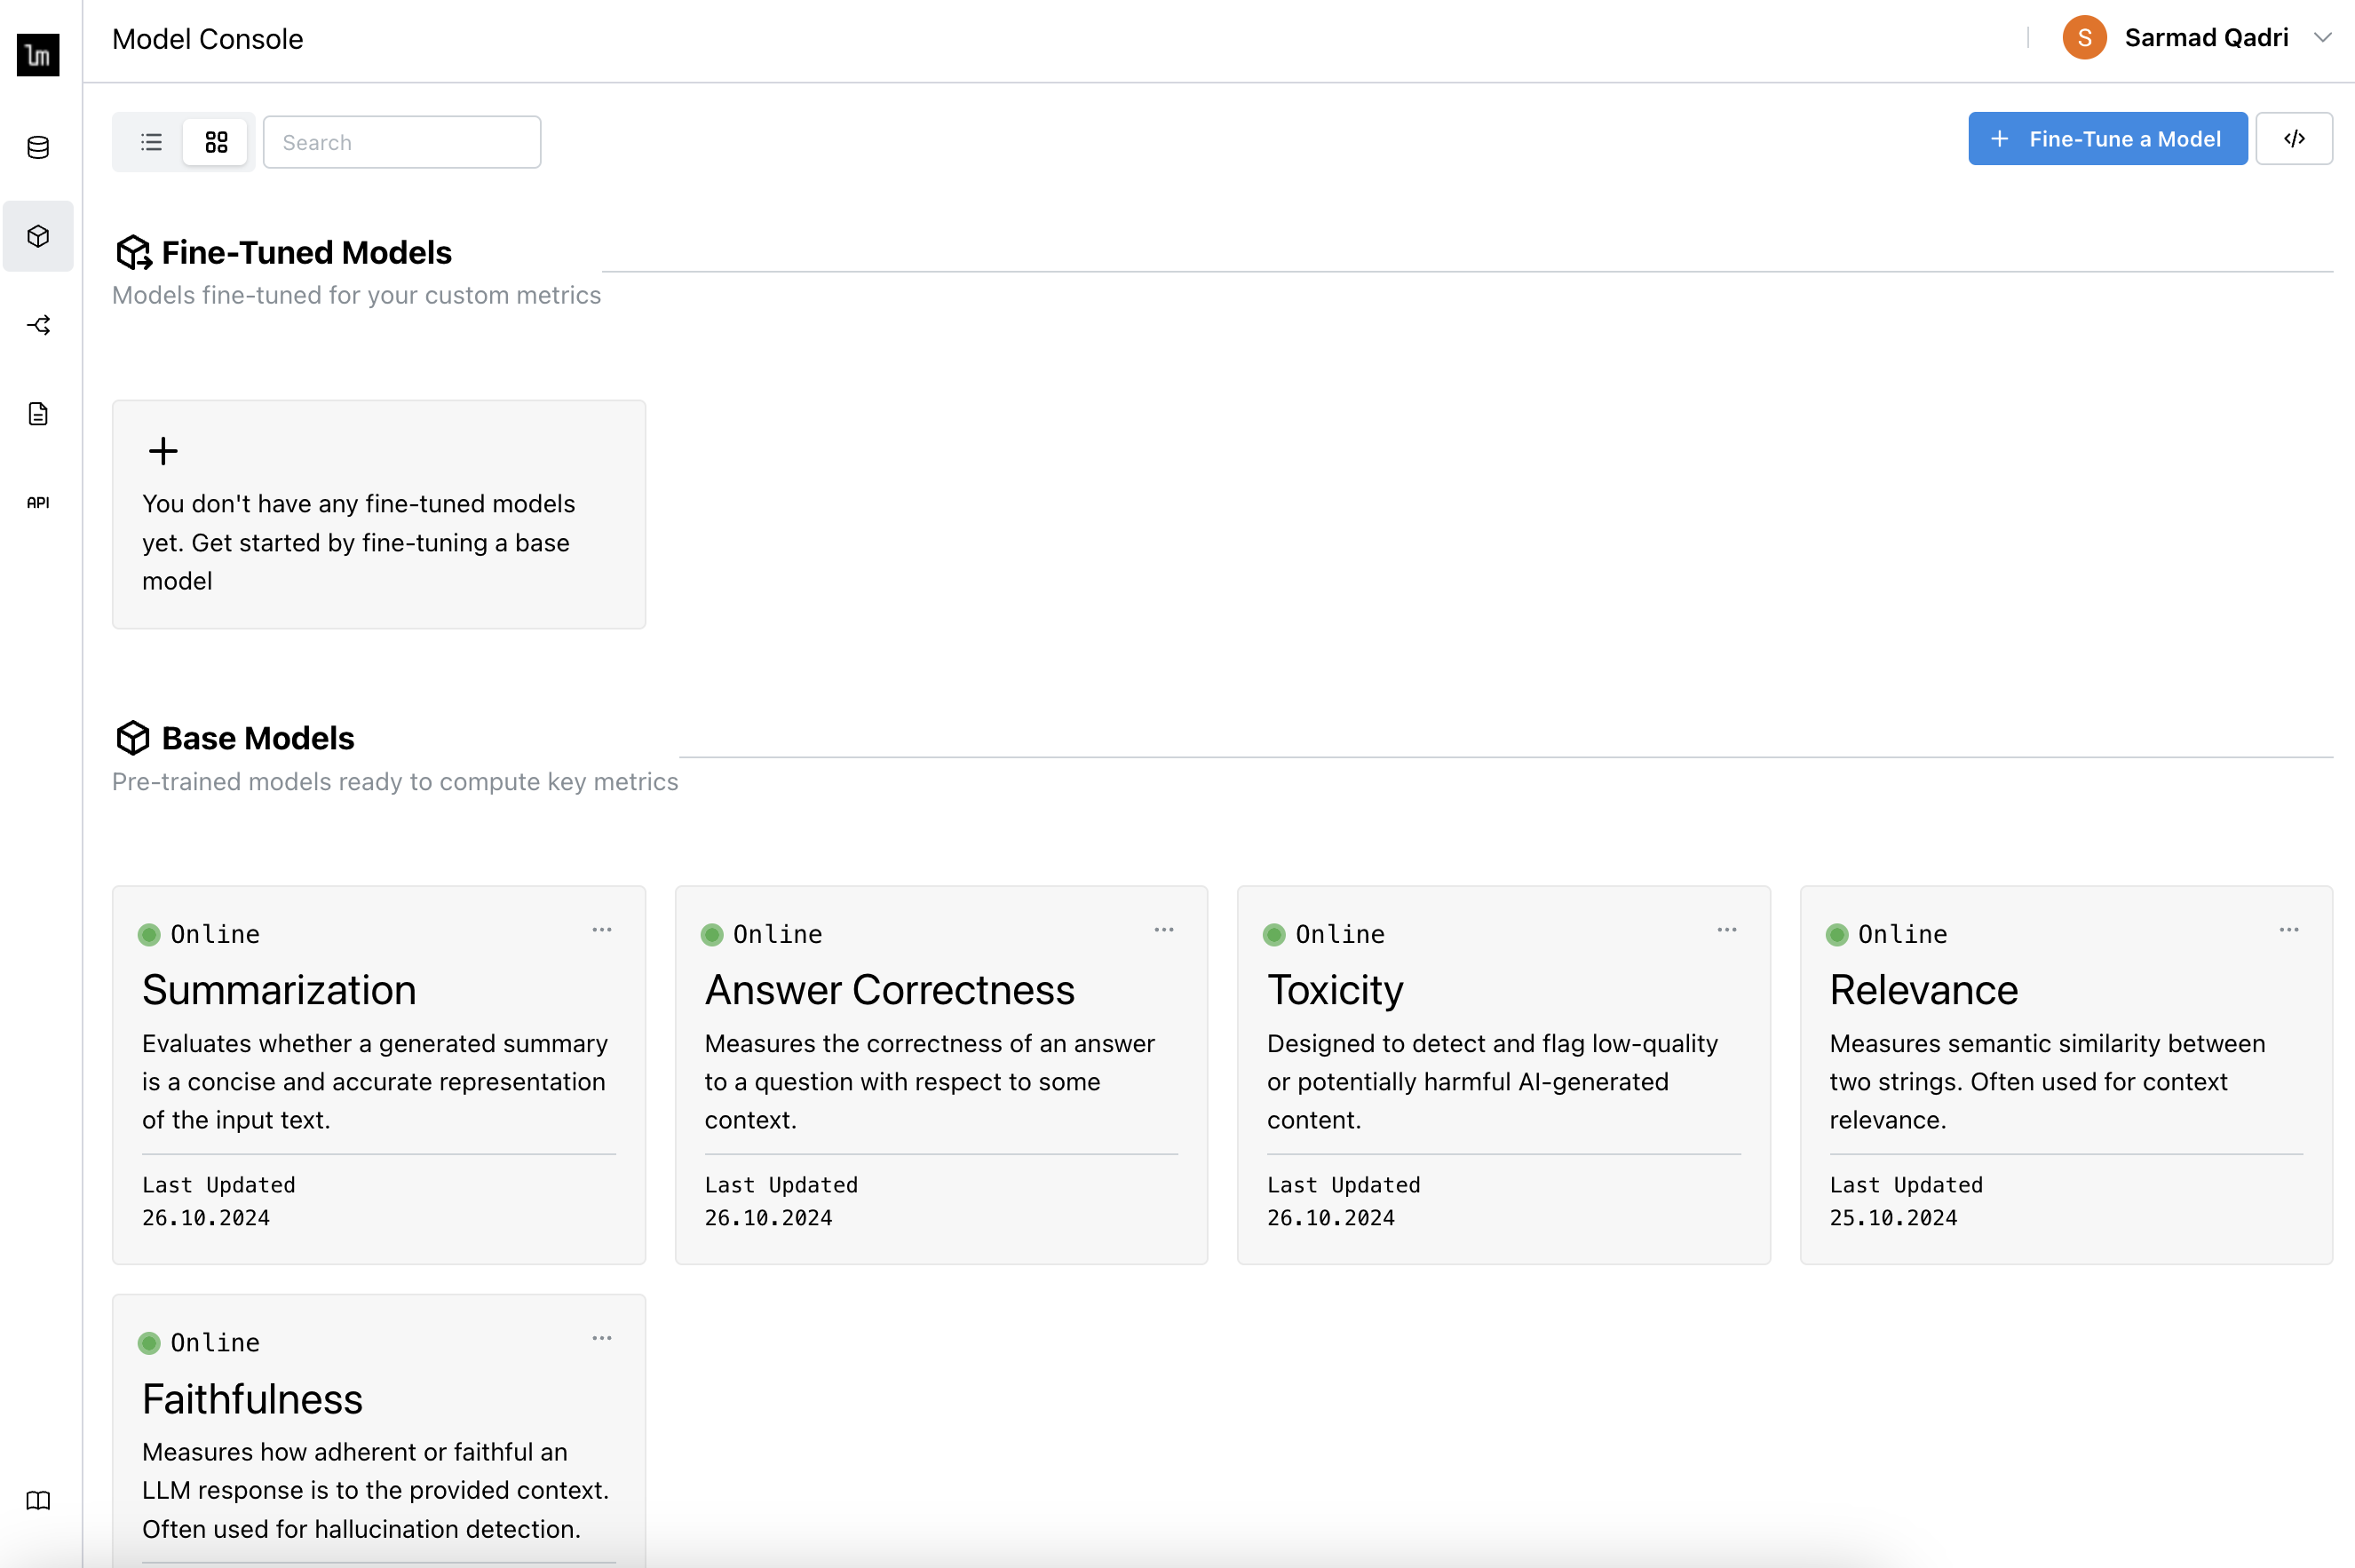
Navigate to Model Console and click Fine-Tune a Model.
-
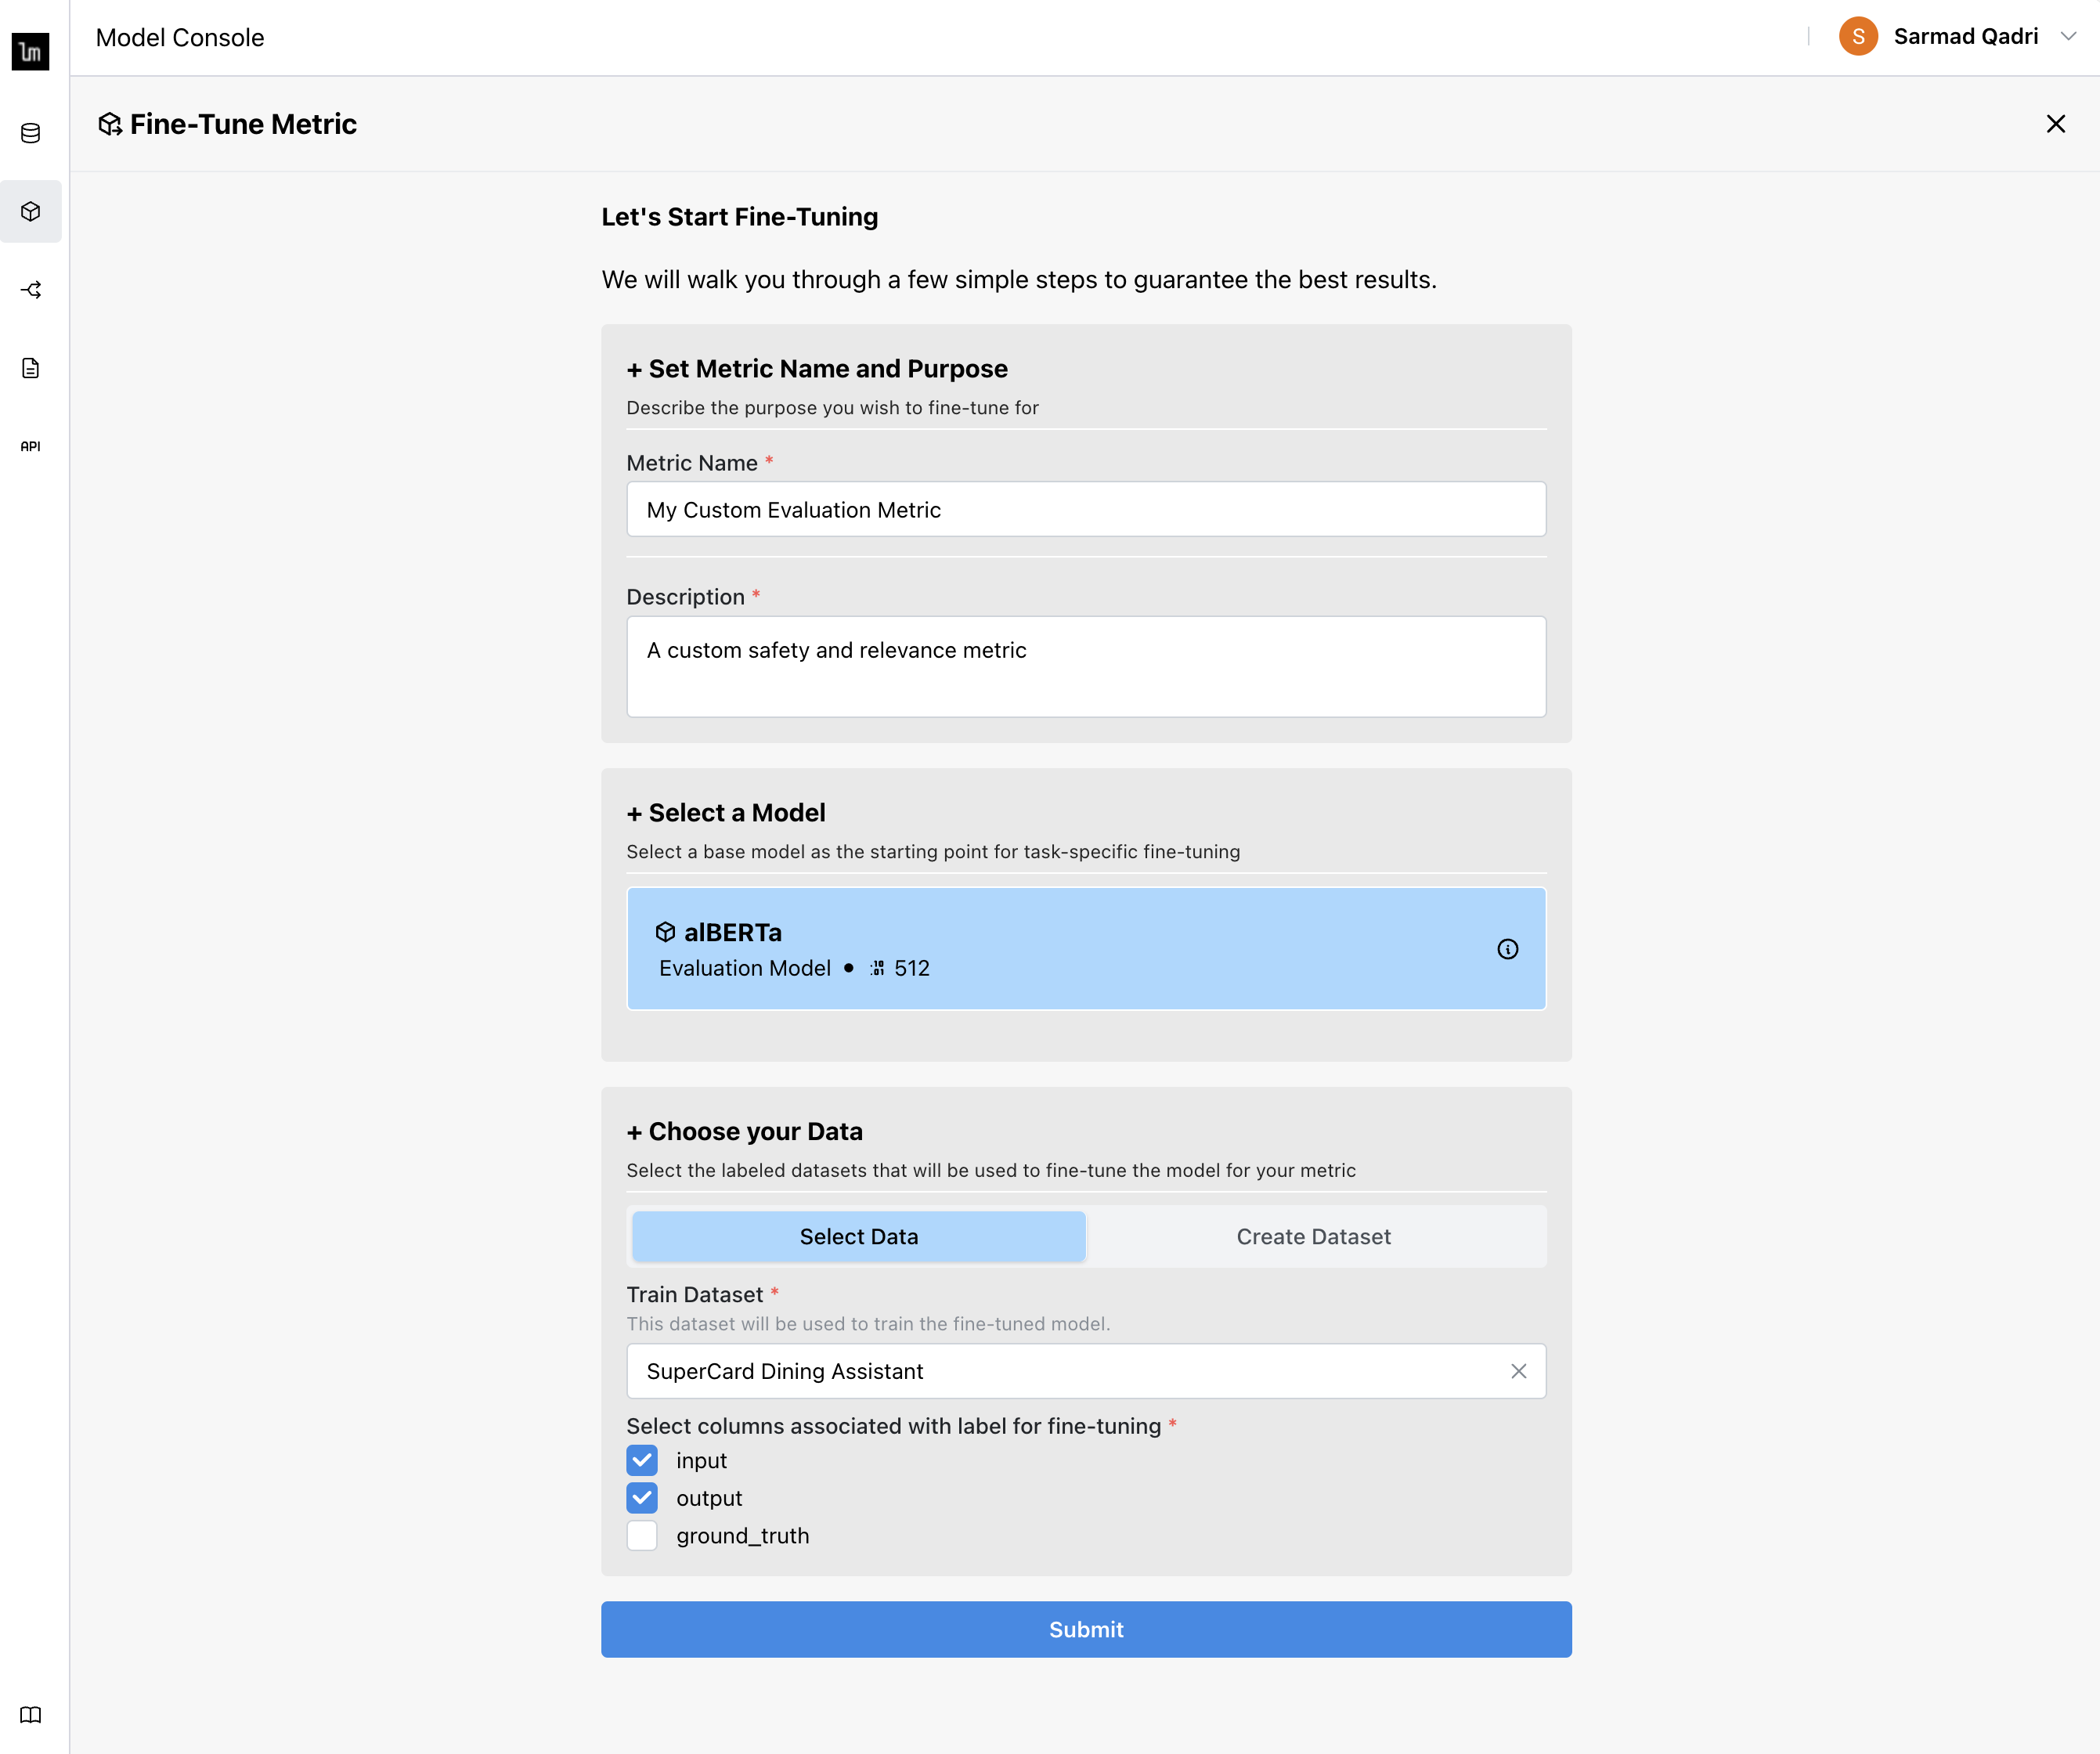
Fill out the Fine-tuning form and click Submit to start the training job.
-
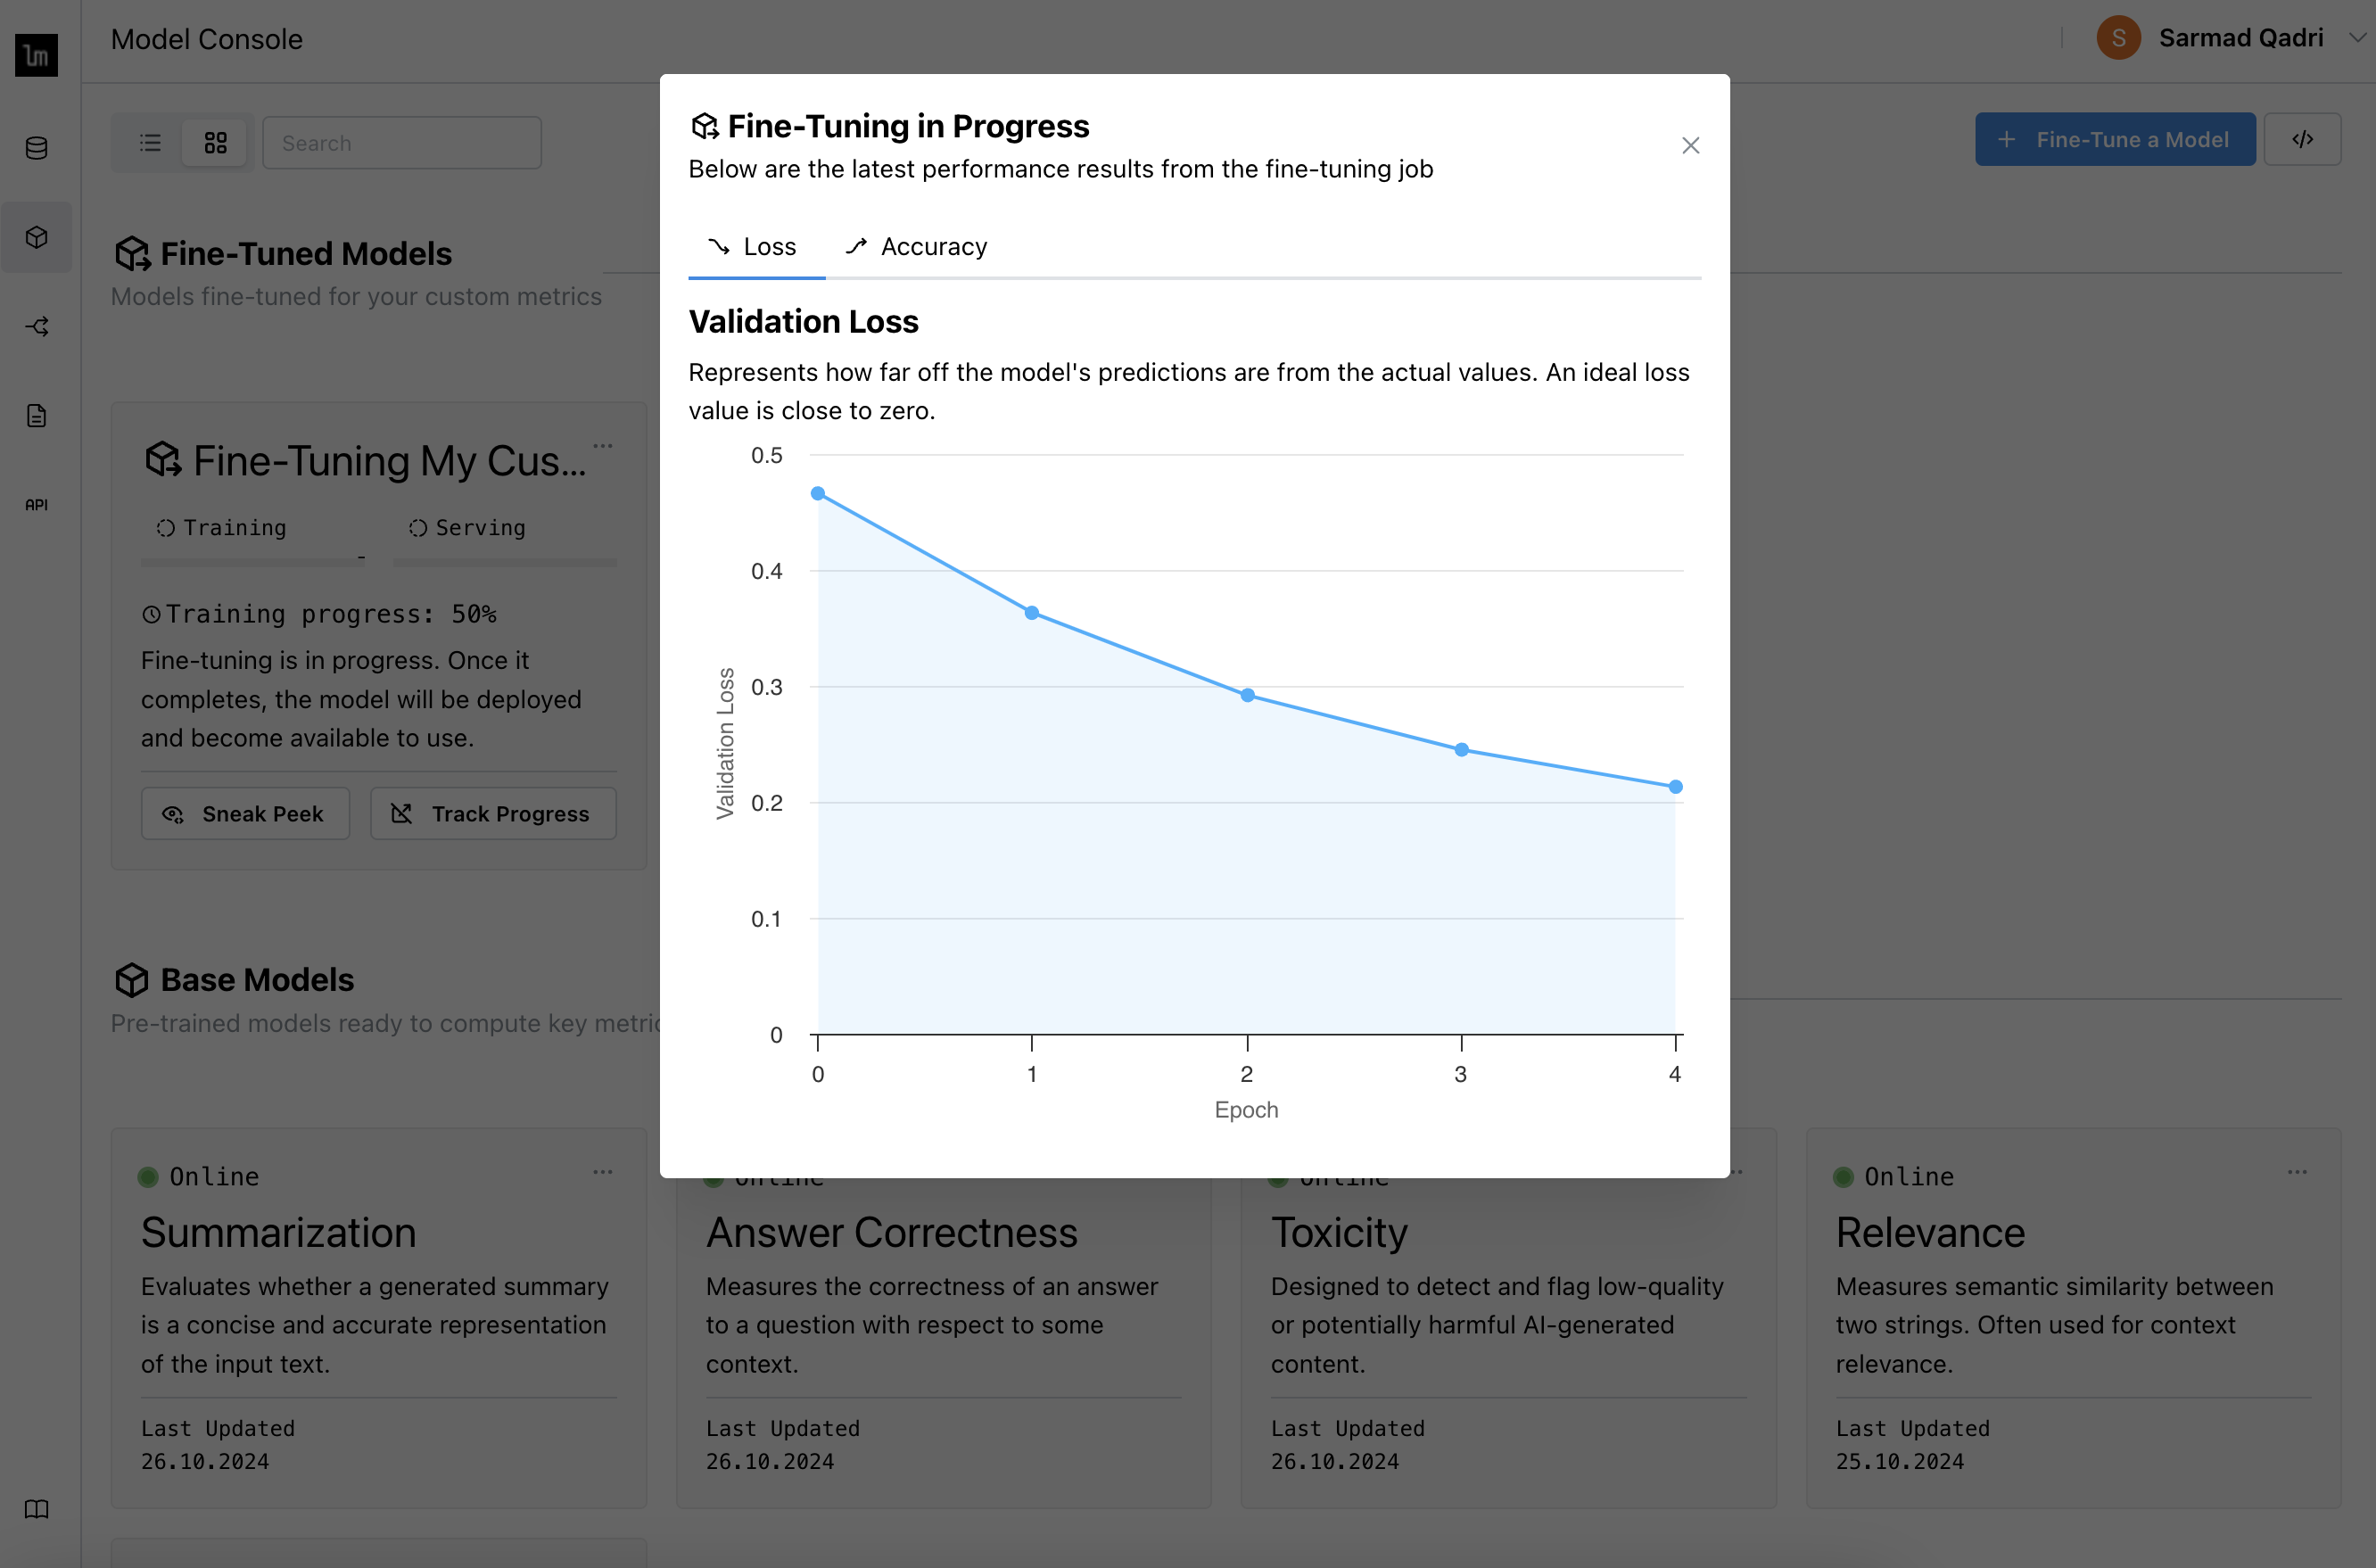
Track progress in the Model Console, including training metrics such as loss/accuracy.
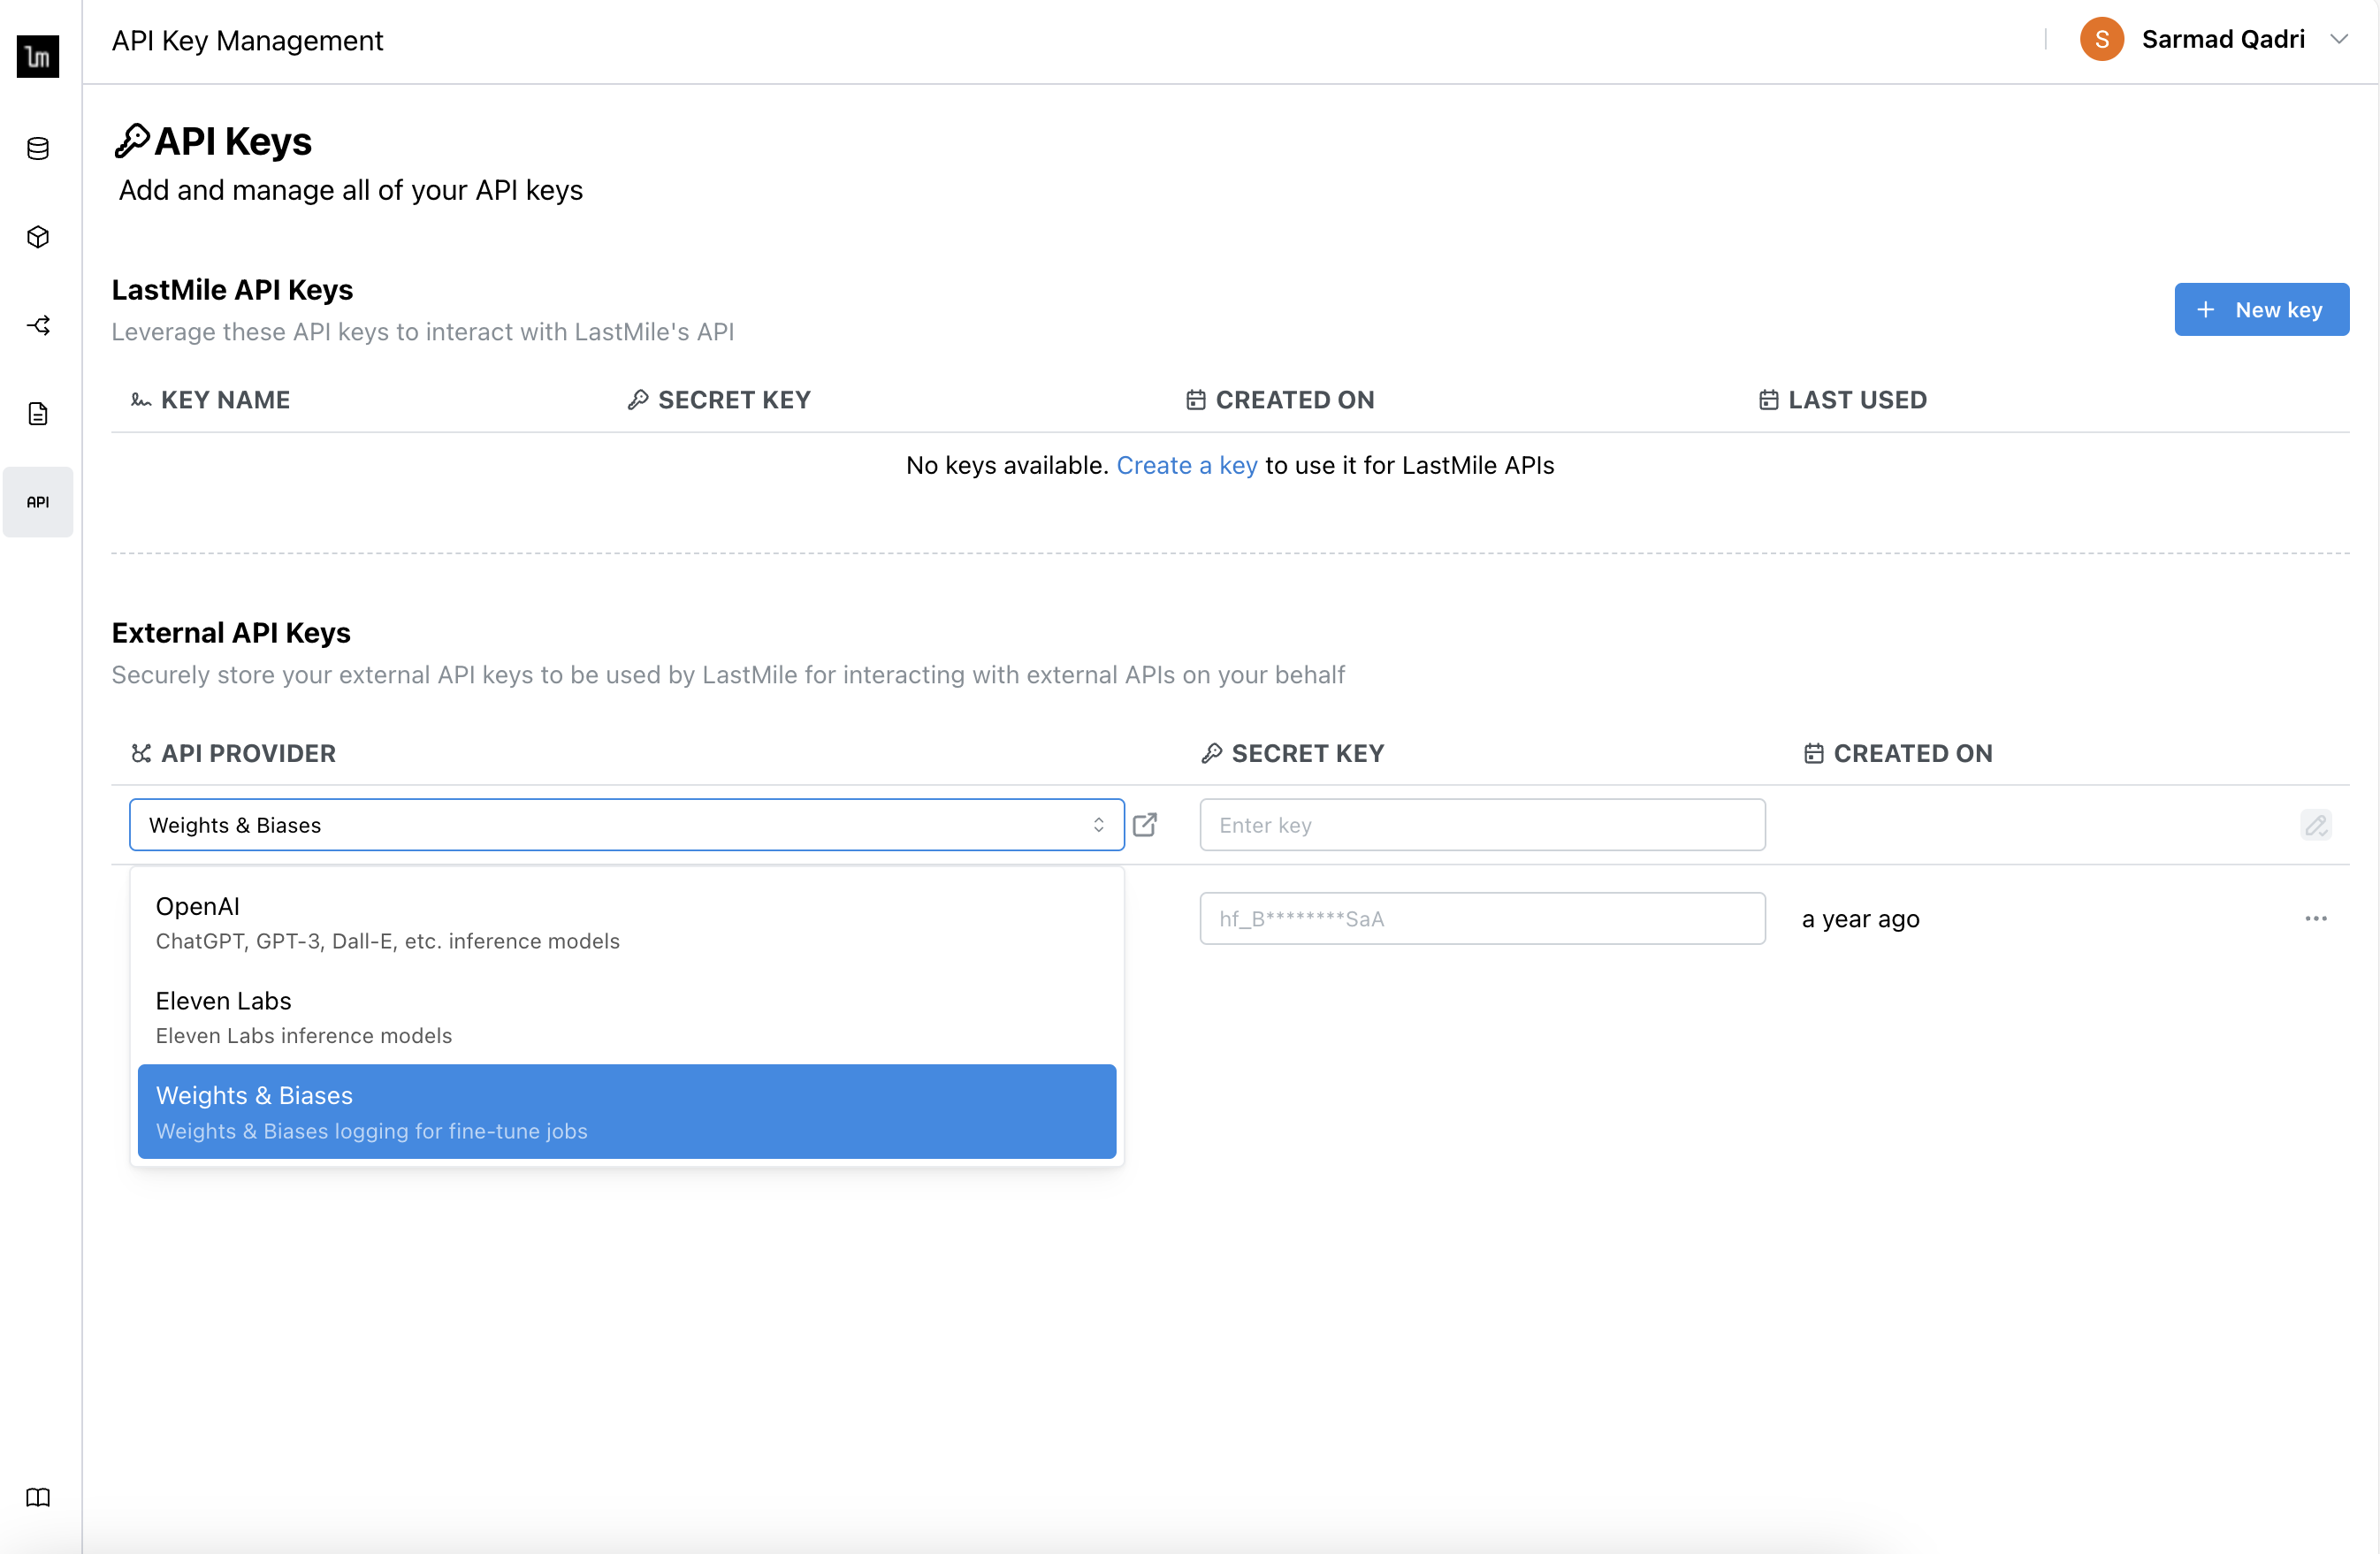
infoSet up your Weights & Biases API key to have the training data logged to your own W&B account if you prefer.
Use fine-tuned model
Once the model is trained and deployed on the inference server, it will be listed as 🟢 Online in the dashboard.
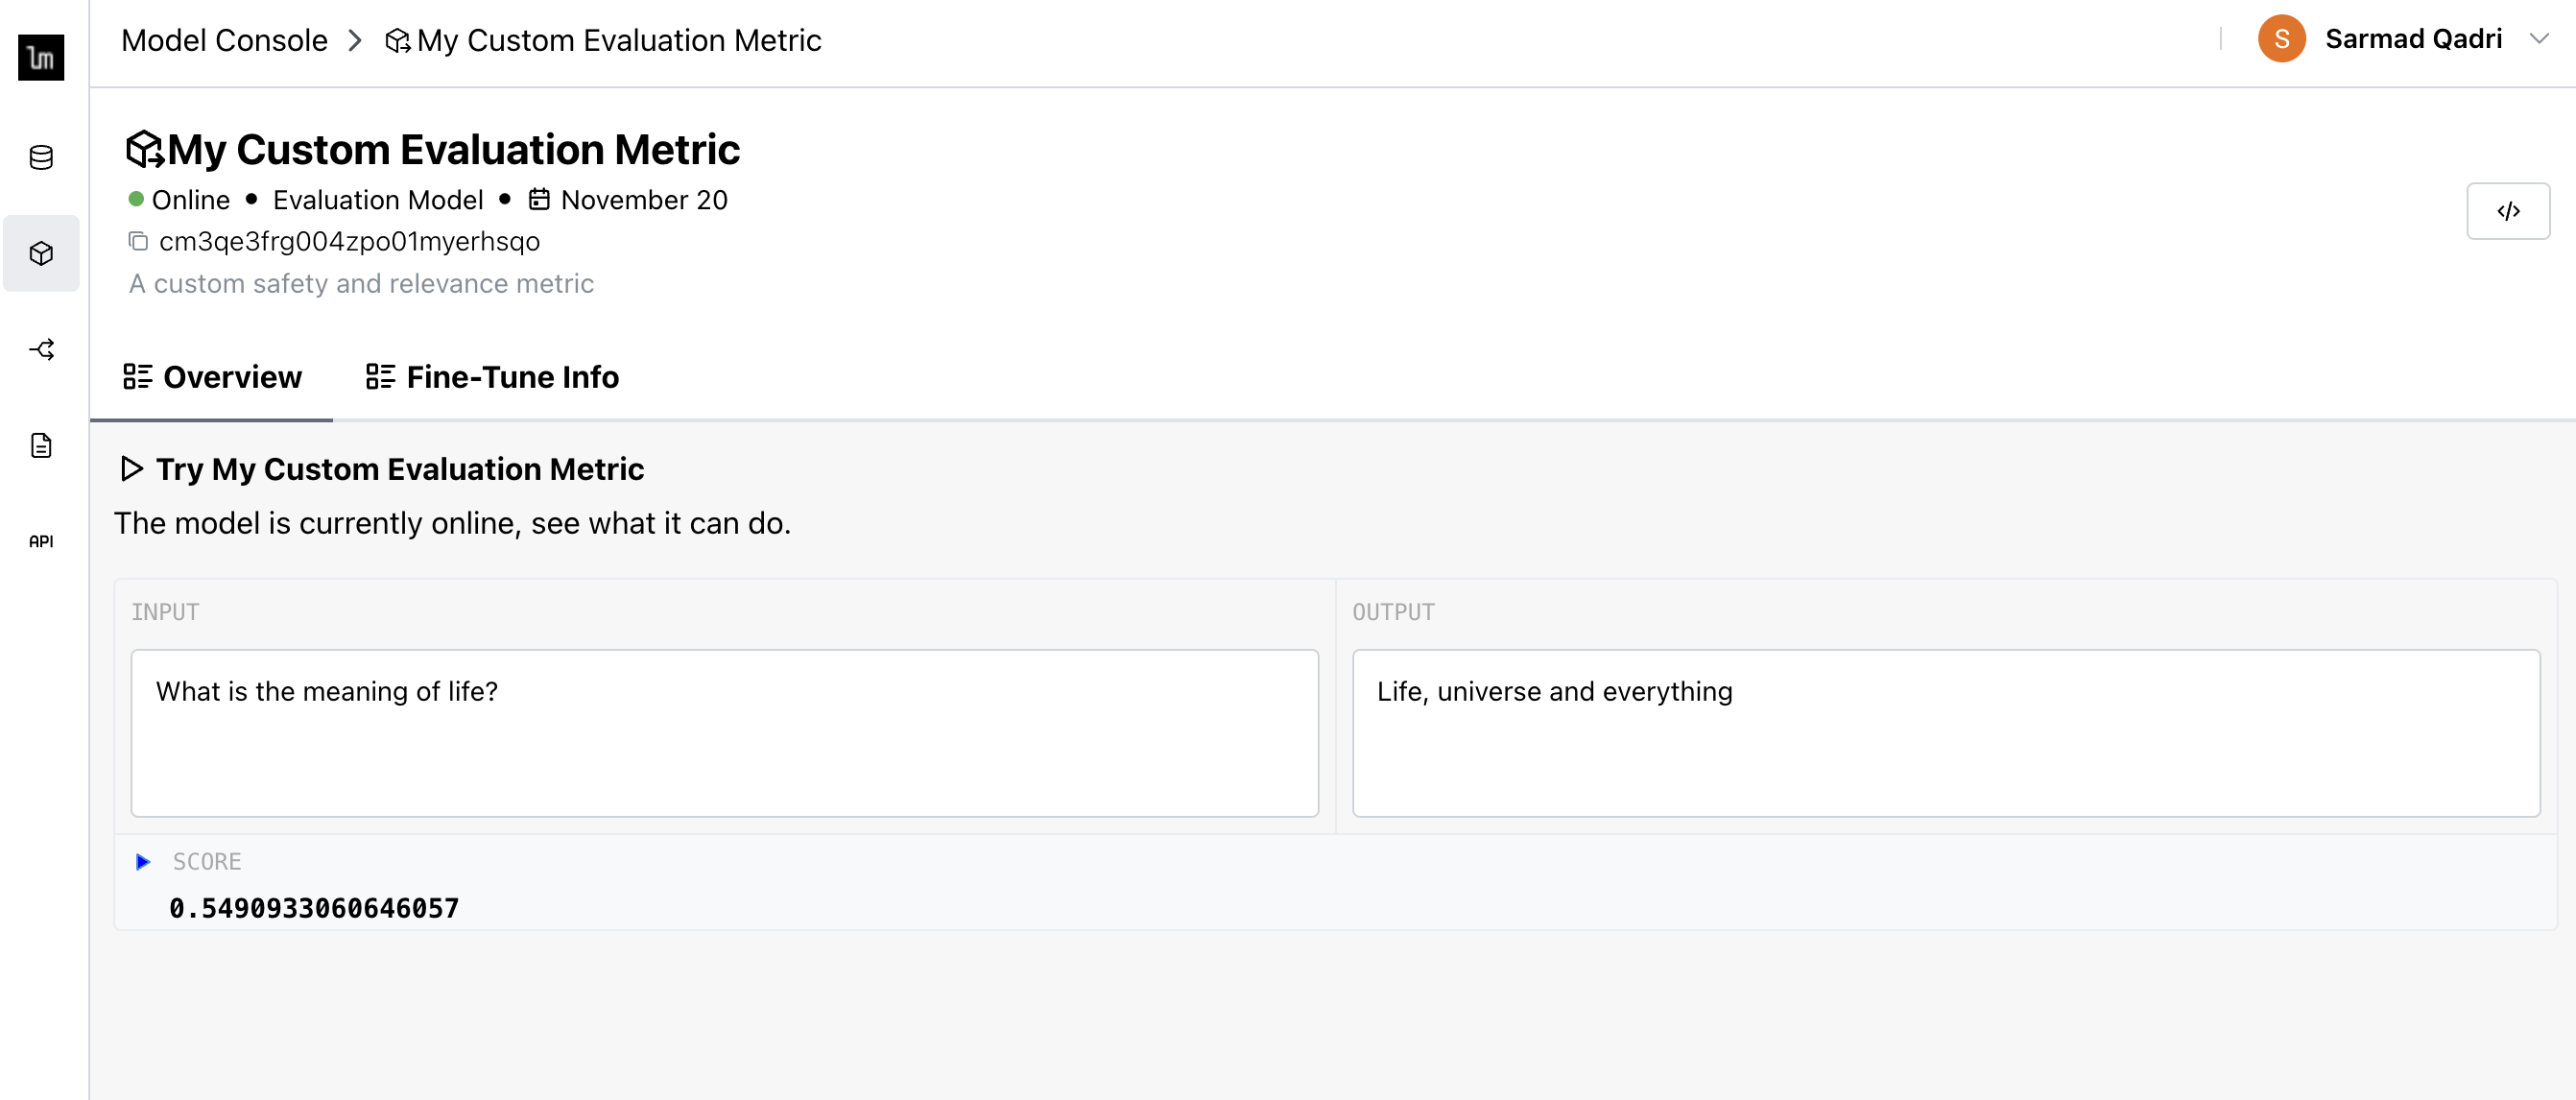
You can try it out directly in the playground, and see its training metrics in the Fine-Tune Info tab.
API
Use the API to run evals using your new model
- python
- node.js
fine_tuned_metric = Metric(name="My Custom Evaluation Metric") # Reference the fine-tuned model by name or id

# Run evals on your test/holdout dataset to see how the model is performing
test_results_df = client.evaluate_dataset(test_dataset_id, fine_tuned_metric)

# Run evals on any application data
eval_results_df = client.evaluate_data(
  # data should include the columns that the model expects
  data=pd.DataFrame({
      "input": ["What is the meaning of life?"],
      "output": ["42"],
      "ground_truth": ["Life, universe and everything"]
  }),
  metrics=[fine_tuned_metric],
)
import { AutoEval, Metric } from "lastmile/lib/auto_eval";
const client = new AutoEval({
  apiKey: "api_token_if_LASTMILE_API_TOKEN_not_set",
});

const metric: Metric = {
  name: "My Custom Evaluation Metric",
};

console.log(`Waiting for fine-tuned model '${metric.name}' to be available as a metric...`);
const fineTunedMetric = await client.waitForMetricOnline(metric);
console.log(`Fine-tuned model '${metric.name}' is now available as a metric with ID: ${fineTunedMetric.id}.`);

// Run evals on your test/holdout dataset to see how the model is performing
const testResults = await client.evaluateDataset(testDatasetId, fineTunedMetric);
console.table(testResults);

// Run evals on any application data
const results = await client.evaluateData(
  /*data*/ [
    {
      "input": "What is the meaning of life?",
      "output": "42",
      "ground_truth": "Life, universe and everything"
    }
  ],
  /*metrics*/ [fineTunedMetric]
);
console.table(results);
Weights & Biases integration
AutoEval allows you to track detailed training runs in your own Weights & Biases account. To do so, navigate to the API Keys console, and save your W&B API key.
Subsequent fine-tuning runs will be tracked in your account.
